Waivers
Curling IO allows you to collect legal agreements, liability releases, photo consents, and other acknowledgments from your curlers during registration. The waiver system supports both required waivers (where users must type acceptance text to continue) and optional waivers (where users can choose to accept or reject).
By default, Curling IO includes waivers from Curling Canada's Business of Curling program intended for curling clubs. These are asked once per season per curler during registration.
We keep a snapshot of each waiver that was responded to for future reference. These snapshots, along with acceptance and rejection data, can be found in the Reports section.
You can customize or replace these waivers with your own text, or deactivate them if you'd rather manage the waiver process in person at the club.
Registration Friction Considerations:
- Required waivers (like liability releases) require typing acceptance text and must be completed to continue registration
- Optional waivers (like photo consent) use simple Accept/Reject buttons and don't block registration, reducing friction while still tracking member preferences
Waivers are specific to your club and are collected once per season per curler when a curler is first registering. They are not event specific.
Editing Waivers
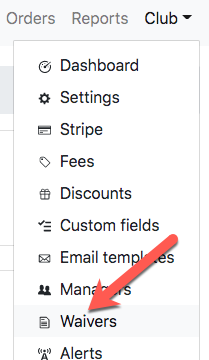
You can find your waivers within the admin area. Click on the Club dropdown menu in the top bar and then click on Waivers.
You should see two waivers listed:
- Adult
- Youth
To customize a waiver, simply click the Edit link next to it.

When done, click the "Update Waiver" button and your changes will be saved.
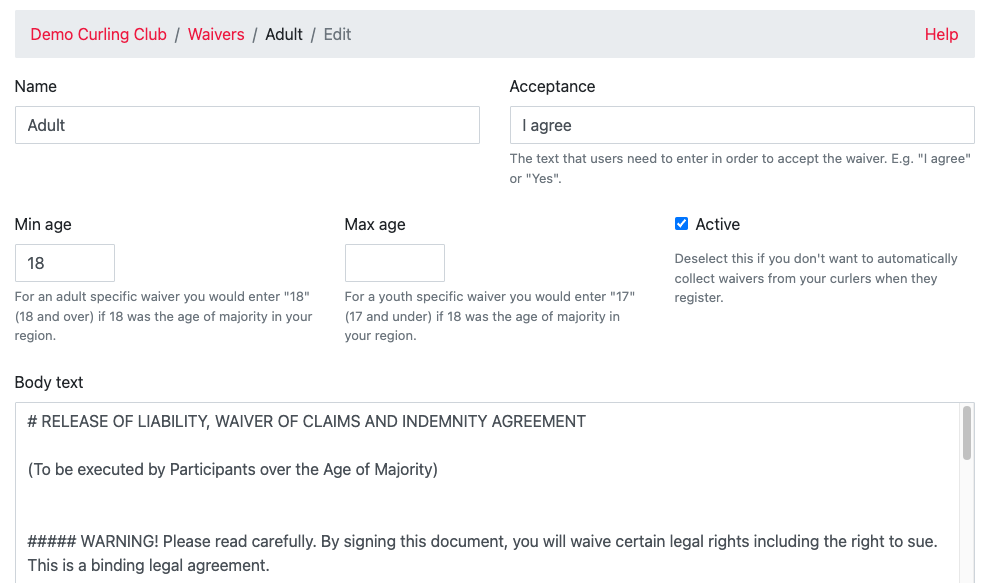
Name
This is the name of your waiver. This won't show up in the actual waiver, but it will identify which waivers have been accepted when curlers view their profiles. Please try to stick to one short word to identify the waiver.
Acceptance
This is the exact text users must type to accept a required waiver. By default this is "I agree" for adult (over the age of majority), and "We agree" for youth (under the age of majority) waivers.
For optional waivers (see Optional Acceptance below), this field can be left blank as users will click Accept/Reject buttons instead of typing text.
Tip: Keep acceptance text short and simple. Users must type it exactly as shown, including capitalization.
Min and Max Age
You can change your age of majority cutoff by editing the min age and max age. These are inclusive, so a min age of 18 will include 18 year olds and a max age of 17 will include 17 years olds.
Optional Acceptance
This checkbox controls whether the waiver is required (users must accept to continue) or optional (users can accept or reject).
- Checked: Users see Accept/Reject buttons and can choose either option. Both choices are recorded. Registration continues regardless of their choice.
- Unchecked (default): Users must type the acceptance text to continue. Registration is blocked until they accept.
When to Use Optional Acceptance:
- Photo/video consent
- Marketing communications opt-in
- Newsletter subscriptions
- Social media promotion consent
- Non-essential agreements
When to Use Required Acceptance:
- Liability waivers
- Code of conduct agreements
- Safety acknowledgments
- Legal releases
- Essential terms and conditions
Active
You can then choose whether or not the waiver is enabled by checking the Active checkbox. The default waivers are active by when your Curling IO instance is created.
Member Experience
Required Waivers
When a member encounters a required waiver during registration:
- They see the waiver content displayed prominently
- A text input field asks them to type the acceptance text (e.g., "I agree")
- They must type the exact text to continue
- Registration is blocked until they accept
Optional Waivers
When a member encounters an optional waiver during registration:
- They see an info banner explaining the waiver is optional
- The waiver content is displayed prominently
- Two large buttons appear: Accept (green) and Reject (gray)
- They can choose either option to continue
- Both acceptance and rejection are recorded
Changing Waiver Responses
Members can view their waiver responses from their profile page (Account → Curlers):
Accepted Waivers:
- Shown as regular clickable links
- Clicking opens the waiver in a printable view
Rejected Waivers:
- Shown as clickable links in red text
- Clicking allows them to review and change their response to accepted
- Members cannot change from accepted to rejected
Body text
To customize the content of your waiver, just edit the Body Text of the waiver. We use a popular format named markdown for text editing. Markdown allows you to add basic formatting to text. You can also use HTML to format the body text. You can find more information on Markdown here.
Best Practices
Writing Effective Waiver Content
- Use Clear, Plain Language: Avoid legal jargon when possible
- Break Up Long Text: Use headings, bullet points, and short paragraphs
- Highlight Important Terms: Use bold for critical information
- Number Key Points: Makes content easier to reference and understand
Choosing Required vs Optional
Use Required for:
- Legal liability releases
- Safety acknowledgments that protect the club
- Code of conduct agreements
- Essential terms and conditions
Use Optional for:
- Photo/video consent
- Marketing communications
- Newsletter subscriptions
- Non-essential programs or features
Tip: Optional waivers reduce registration friction while still tracking member preferences. Use them for consents that shouldn't block participation.
Age-Based Waivers
- Create separate waivers for minors (often requiring parent/guardian signature)
- Use "We agree" for minor waivers (implies parent/guardian consent)
- Use "I agree" for adult waivers (personal consent)
- Always test with sample members of different ages
Reporting and Compliance
The Waiver Reports show both acceptances and rejections:
- Accepted column displays "Yes" for accepted, "No" for rejected
- Export waiver data regularly for backup and compliance purposes
- Both required and optional waivers track responses for record-keeping